前言
最近,一个朋友给我分享了他在国企面试的经历,面试官竟然花了超过半个小时讨论Swagger的问题。虽然面试中遇到各种奇怪的问题是常态,但这次的情况让我觉得这位面试官可能有些犹豫,不知该如何结束这场面试,哈哈!

Swagger简介
Swagger是当前较为流行的RESTful风格API文档工具,开发者在项目中几乎都会使用它。
 它提供了一整套工具和规范,使开发人员能够更轻松地创建和维护可读性良好且易于使用的API文档(官方说明)。
title: Swagger
desc: Swagger 官方网站
logo: https://static1.smartbear.co/swagger/media/assets/images/swagger_logo.svg
link: https://swagger.io/
为什么选择Swagger?
在Swagger出现之前,开发人员需要手动编写和维护API文档,而随着API频繁变更,这使得文档更新变得困难,这对依赖该文档的开发者造成了困扰。
Swagger具有以下几个显著特点:
- 可以根据代码注解自动生成API文档,确保文档的准确性,避免手动维护的麻烦。同时,API文档与API定义能够实时同步更新。
- 提供一个可执行的Web界面,支持在线测试API,用户可以直接在界面上设置参数进行测试,无需额外的工具或插件。
- 支持多种编程语言,如Java、PHP、Python等,开发者可以根据自己的喜好选择语言构建API。
总而言之,Swagger使我们能够将更多时间投入到编码中,而不是在文档维护上耗费精力。因此,实践出真知,先动手跑个demo试试吧。
Swagger搭建步骤
Maven依赖
当前使用的版本为Swagger 3.0和Spring Boot 2.7.6,Swagger 2.0与3.0的依赖包名称变化较大,需特别注意。
<dependency>
    <groupId>org.springframework.boot</groupId>
    <artifactId>spring-boot-starter-web</artifactId>
    <version>2.7.6</version>
</dependency>

<dependency>
    <groupId>io.springfox</groupId>
    <artifactId>springfox-boot-starter</artifactId>
    <version>3.0.0</version>
</dependency>
配置类
首先,创建一个控制器TestController类,内含一个简单的请求 /test。
@RestController
public class TestController {
    @RequestMapping("/test")
    public String test(String name) {
        return name;
    }
}
接下来,创建配置类SwaggerConfig,需要添加@EnableSwagger2注解,这样就搭建好了最基本的Swagger文档环境。
import org.springframework.context.annotation.Configuration;
import springfox.documentation.swagger2.annotations.EnableSwagger2;

@Configuration
@EnableSwagger2
public class SwaggerConfig {
}
启动时可能遇到的错误
启动过程中,可能出现如下错误,这通常是由于高版本Spring Boot与Swagger路径匹配策略冲突导致的。
Springfox使用的路径匹配规则为AntPathMatcher,而SpringBoot2.7.6采用的是PathPatternMatcher,两者间出现了冲突。
org.springframework.context.ApplicationContextException: Failed to start bean 'documentationPluginsBootstrapper'; nested exception is java.lang.NullPointerException
...
解决方案
针对此错误,有多种解决方案:
1. 降低版本
将Spring Boot版本降低至2.5.X,并将springfox降至3.X以下可以解决问题,但不推荐此做法以保持版本一致性。
2. 统一路径匹配策略
将SpringMVC的路径匹配策略改为ant_path_matcher,在application.yml文件中添加以下配置:
spring:
  mvc:
    pathmatch:
      matching-strategy: ant_path_matcher
3. 使用@EnableWebMvc注解
在配置类SwaggerConfig上添加@EnableWebMvc注解同样可解决此问题。这是因为Swagger需要通过解析和扫描带有注解的Controller类和方法以生成API文档。
@EnableWebMvc
@Configuration
@EnableSwagger2
public class SwaggerConfig {
}
4. 注册BeanPostProcessor
可以在Spring容器中注册一个BeanPostProcessor,定制HandlerMappings以适应Swagger的要求,从而解决可能导致Swagger无法正常工作的路径匹配冲突。
访问Swagger UI
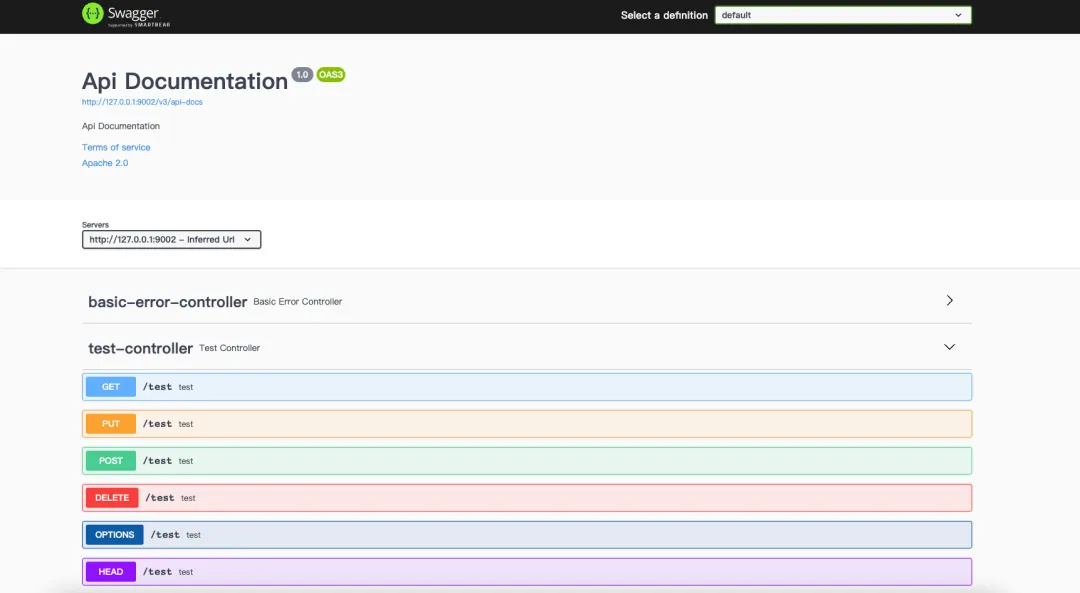
到此问题便已解决,访问Swagger文档路径 http://127.0.0.1:9002/swagger-ui/index.html,你将看到自己编写的API信息及一些Swagger文档的默认配置。
 请注意,由于我们在
controller方法中使用了@RequestMapping注解而未指定具体的请求方式,因此文档中列出了所有请求方式。为了避免文档冗余,建议明确指定请求方式或使用特定请求方式的@XXXMapping注解。
指定请求方式后效果如下:

API文档配置
浏览器中展示的数据为默认配置,现在我们来定制化文档。
Springfox提供了一个Docket对象,供我们灵活配置Swagger的各项属性。Docket对象内含多个方法配置文档,以下是一些常用配置项。
select
select()返回一个ApiSelectorBuilder对象,是使用apis()、paths()两个方法的前提,用于指定Swagger要扫描的接口和路径。
apis
默认情况下,Swagger会扫描整个项目中的接口,通过apis()方法,可以传入一个RequestHandlerSelector对象实例来指定接口所在的包路径。
@Bean
public Docket docket(Environment environment) {
    return new Docket(DocumentationType.SWAGGER_2)
            .select()
            .apis(RequestHandlerSelectors.basePackage("com.springboot101.controller"))
            .build();
}
paths
可以仅将特定请求路径的API展示在Swagger文档中,例如路径中包含/test。可以使用apis()和paths()方法一起过滤接口。
@Bean
public Docket docket(Environment environment) {
    return new Docket(DocumentationType.SWAGGER_2)
            .select()
            .paths(PathSelectors.ant("/test/**"))
            .build();
}
groupName
为生成的Swagger文档指定分组名称,用于区分不同文档组。
@Bean
public Docket docket(Environment environment) {
    return new Docket(DocumentationType.SWAGGER_2)
            .groupName("用户分组")
            .build();
}
要实现文档的多个分组,需要创建多个Docket实例,设置不同的组名,并过滤API条件。
@Bean
public Docket docket1(Environment environment) {
    return new Docket(DocumentationType.SWAGGER_2)
            .groupName("商家分组")
            .select()
            .paths(PathSelectors.ant("/test1/**"))
            .build();
}
apiInfo
设置API文档的基本信息,如标题、描述、版本等,可以使用ApiInfo对象自定义信息。
@Bean
public Docket docket(Environment environment) {
    return new Docket(DocumentationType.SWAGGER_2)
            .apiInfo(apiInfo()); // 文档基础配置
}

private ApiInfo apiInfo() {
    Contact contact = new Contact("小富", "http://fire100.top", "email@example.com");
    return new ApiInfoBuilder()
            .title("Swagger学习")
            .description("程序员小富-带你一起学习 Swagger")
            .version("v1.0.1")
            .termsOfServiceUrl("http://fire100.top")
            .contact(contact)
            .license("许可证")
            .licenseUrl("许可链接")
            .extensions(Arrays.asList(
                    new StringVendorExtension("我是", "小富"),
                    new StringVendorExtension("你是", "谁")
            ))
            .build();
}
enable
可以启用或禁用Swagger文档的生成,某些环境下可能需要在生产中禁用API文档。
@Bean
public Docket docket(Environment environment) {
    Profiles of = Profiles.of("dev", "test", "pre");
    boolean enable = environment.acceptsProfiles(of);

    return new Docket(DocumentationType.SWAGGER_2)
            .enable(enable)
            .apiInfo(apiInfo()); // 文档基础配置
}
host
设置API文档显示的主机名称或IP地址,即在测试执行接口时使用的IP或域名。
@Bean
public Docket docket(Environment environment) {
    return new Docket(DocumentationType.SWAGGER_2)
            .host("http://test.com") // 请求地址
            .apiInfo(apiInfo()); // 文档基础配置
}
securitySchemes
配置API的安全认证方式,如Bearer、Authorization、Basic等鉴权字段,ApiKey对象中字段含义分别是别名、鉴权字段key、鉴权字段添加的位置。
@Bean
public Docket docket(Environment environment) {
    return new Docket(DocumentationType.SWAGGER_2)
            .securitySchemes(
                    Arrays.asList(
                            new ApiKey("Bearer鉴权", "Bearer", "header"),
                            new ApiKey("Authorization鉴权", "Authorization", "header"),
                            new ApiKey("Basic鉴权", "Basic", "header")
                    )
            );
}
配置后,Swagger文档将包含一个Authorize按钮,供用户输入设定的Bearer、Authorization、Basic进行身份验证。
securityContexts
虽然在securitySchemes方法中设置了鉴权字段,但在测试接口时不会自动在header中加入鉴权字段和值,因此需要配置API的安全上下文。
@Bean
public Docket docket(Environment environment) {
    return new Docket(DocumentationType.SWAGGER_2)
            .securitySchemes(
                    Arrays.asList(
                            new ApiKey("Bearer鉴权", "Bearer", "header"),
                            new ApiKey("Authorization鉴权", "Authorization", "header"),
                            new ApiKey("Basic鉴权", "Basic", "header")
                    )
            )
            .securityContexts(Collections.singletonList(securityContext()));
}

private SecurityContext securityContext() {
    return SecurityContext.builder()
            .securityReferences(
                    Arrays.asList(
                            new SecurityReference("Authorization", new AuthorizationScope[0]),
                            new SecurityReference("Bearer", new AuthorizationScope[0]),
                            new SecurityReference("Basic", new AuthorizationScope[0])))
            .build();
}
tags
为API文档中的接口添加标签,便于分类和组织。
@Bean
public Docket docket(Environment environment) {
    return new Docket(DocumentationType.SWAGGER_2)
            .tags(new Tag("小富接口", "小富相关的测试接口"))
}
授权登录
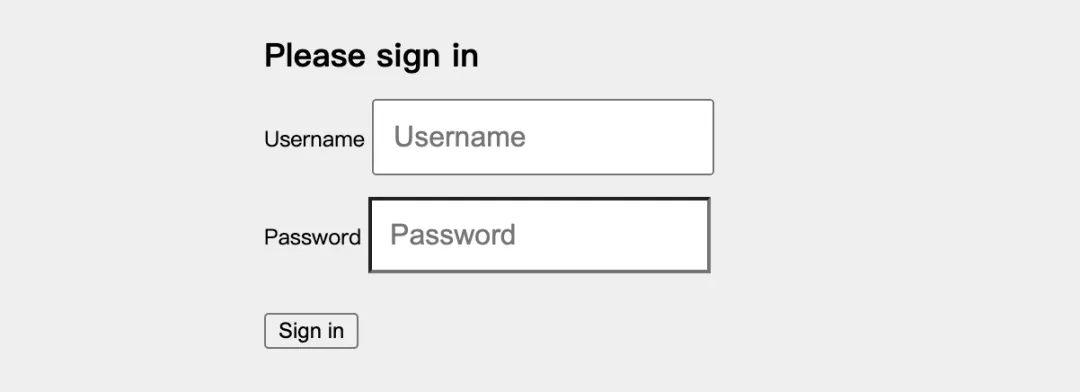
出于系统安全考虑,通常会为API文档增加登录功能。
引入Maven依赖
Swagger的安全登录基于spring security,需要引入相关Maven依赖。
<dependency>
    <groupId>org.springframework.boot</groupId>
    <artifactId>spring-boot-starter-security</artifactId>
</dependency>
登录配置
在application.yml文件中配置Swagger的用户名和密码。
spring:
  security:
    user:
      name: admin
      password: 123456
再次访问文档时会出现如下登录页:

文档注解
为了在Swagger文档中提供更加详细和完整的内容,我们可以使用其他Swagger内置注解来丰富API文档。
@ApiIgnore
可以使用@ApiIgnore注解来忽略文档中的特定API。
@ApiIgnore
@GetMapping("/user2/{id}")
public User test2(@PathVariable Integer id, @RequestBody User user) {
    return user;
}
@ApiModel
使用@ApiModel注解为实体添加描述信息,提升Swagger对Model的描述。
@ApiModel(value = "用户实体类", description = "用于存放用户登录信息")
@Data
public class User {
    @ApiModelProperty(value = "用户名字段", required = true, example = "#公众号:程序员小富")
    private String name;

    @ApiModelProperty(value = "年龄", required = true, example = "19")
    private Integer age;

    @ApiModelProperty(value = "邮箱", required = true, example = "#公众号:程序员小富")
    private String email;
}
@Api
用以标记控制器类,并提供接口的详细信息和配置项。
@Api(value = "用户管理接口描述",
        description = "用户管理接口描述",
        hidden = false,
        produces = "application/json",
        consumes = "application/json",
        protocols = "https",
        tags = {"用户管理"},
        authorizations = {
                @Authorization(value = "apiKey", scopes = {
                    @AuthorizationScope(scope = "read:user", description = "读权限"),
                    @AuthorizationScope(scope = "write:user", description = "写权限")
                })
        })
@RestController
public class TestController {
}
@ApiOperation
该注解用于描述接口方法。
@ApiOperation(
        value = "获取用户信息",
        notes = "通过用户ID获取用户的详细信息",
        hidden = false,
        response = UserDto.class,
        tags = {"用户管理"},
        produces = "application/json",
        consumes = "application/json",
        protocols = "https",
        authorizations = {
            @Authorization(value = "apiKey", scopes = {@AuthorizationScope(scope = "read:user", description = "读权限")}),
            @Authorization(value = "Basic")
        },
        responseHeaders = {@ResponseHeader(name = "X-Custom-Header", description = "Custom header", response = String.class)},
        code = 200,
        httpMethod = "GET"
)
@GetMapping("/user1")
public UserDto user1(@RequestBody User user) {
    return new UserDto();
}
@ApiImplicitParams 和 @ApiImplicitParam
这两个注解可用于对API方法中的参数进行详细说明,确保参数信息的透明度。
@ApiImplicitParams({
        @ApiImplicitParam(name = "用户名", value = "用户名称信息", required = true, dataType = "String", paramType = "query")
})
@GetMapping("/user")
public String user(String name) {
    return name;
}
总结
尽管在面试中不太可能过多考察Swagger这类工具,但作为开发者,养成良好的文档规范习惯尤为重要。无论使用Swagger还是其他文档工具,编写清晰、详尽的API文档都应成为我们的一项基本素养。
感谢大家的阅读,希望这些内容对你们有所帮助,我们下篇见!
代码示例
https://github.com/chengxy-nds/Springboot-Notebook/tree/master/springboot101/%E6%8E%A5%E5%8F%A3%E6%96%87%E6%A1%A3/springboot-swagger
